
Solar energy is the energy source of not only the future but also of the present. A lot of people are making the shift to renewable solar energy from electricity and this has created an increased demand in the market for solar panels in developing countries like India. However, a lot of people are still unsure about who to trust when it comes to installing solar panels and getting the entire process going. In this situation, a lot of enthusiastic individuals have chosen to go the DIY route when it comes to installing solar panels. And indeed, doing it yourself can prove to be a very rewarding experience. Still, many people are nervous at the thought of giving it a go and this is what we wish to change. After going through this article you will have a decent idea regarding how to install solar panels at home.
In this article, we will go through a detailed step by step process of how to install solar panels from the perspective of a newbie who has very minimal knowledge about solar energy in general and the installation of solar panels in particular. Irrespective of whether you are looking to install a grid-tier system or an off-grid setup, we will attempt to outline all the important details surrounding the art of installing solar panels in this discussion. Note that we have tried our best to keep things more or less relatively simple so that the average layman could get a fair idea about how this process works. If you feel that the information in this article is not enough to help you get started, then you can definitely do further research and get into more detail.
Before getting into the technical aspects of installing solar panels, we would like to give you a few pointers on planning and safety aspects that you should be thinking about. First of all, make sure that you have a clear list of the things that you have purchased and whether they cover all of the non-essentials such as wiring, tools etc. If you have ordered the equipment online, make sure that all of it has arrived in proper condition and that nothing is missing or damaged. Also make sure to check the safety regulations thoroughly that are mentioned in the instruction manual.
Besides the main panels and accessories, there are a few other things you need to purchase in order to carry out successful installation of the solar panels. The first of these things that you need to consider is the wiring equipment. You need to get your hands on an electrical wiring diagram that will help you determine the length and specifications of the wiring that you will need for your solar panel setup. You can use this diagram to get the right materials from your local hardware store.

As for junction boxes and splices, make sure that they meet the voltage and ampere requirements of the circuit you wish to include them in. Also be sure to use insulated lugs and approved splicing devices only. If you are using outdoor boxes, they should be rated separately for outdoor use.
Then we come to the question of AC breakers. AC breakers are there to import and export AC power from your solar equipment. Also make sure to check your breaker panel for a list of compatible options for circuit breakers. AC solar circuits can also be combined using sub-panels. However, make note of the fact that sub-panels will prevent you from installing load breakers inside them. Also, if you do choose to go with sub-panels, make sure to size them with moderate headroom so that they can cover the output coming from the solar circuits.

Next you need to consider the issues of AC disconnections and fuses. Most of the solar panel system will require you to install a lockable safety disconnector anyway. In the case of conventional connections, a non-fused manual disconnect is required. This could be included in your system so make sure to check that properly. In case you plan to use a line-side tap connection, a fused manual AC disconnect is required. The fusing ensures that the circuit does not suffer from accidents due to overcharges. In order to get the specific details regarding the mounting of AC disconnects, it's always better to check with your local authorities.

PV meters are another essential element that helps you to keep track of your solar panel’s performance on a daily basis. If you have a grid-tier system in mind, then you definitely need a PV meter. In other cases, all you need to do is just install a meter socket or a base.
Always be sure to use a larger conduit than what is specified in your plan. Also check with your state and municipal authorities to see if the solar wiring has to be transitioned to conduit before leaving the array. You have two different options in terms of conduits, EMT and ENT. EMT is a thin-walled conduit that has to be grounded and is generally made out of steel. ENT on the other hand is non-metallic and does not need to be grounded. ENT conduits are generally more cost effective. However, most building codes do not allow its usage so make sure to check with your local authorities.
As far as mounting is concerned, you have two different options at your disposal. Ground mounting will require you to create a concrete bracing with 2 or 3 inch mechanical tubes. You will also need a lumber that will act as the base of the build and help to hold the pipes in place.

For a roof mounting setup you will need to buy several tubes of roof sealant in order to prevent leaks as well as damage from wind and other weather elements.
Solar panel installation involves quite a few hazardous steps as it requires you to undertake electrical work as well as some heavy lifting as well. Because of these reasons it is vitally important that you take all of the essential safety precautions.
The first thing that is important for you to secure is the right combination of protective equipment. Solar equipment can cause cuts, lacerations or puncture wounds if it's not handled properly. We would recommend you to wear eye protection and also wear full shoes as well as gloves. Also make sure to remove all types of metallic jewelry while handling solar equipment. Lastly, we would recommend you to wear long sleeves during mixing concrete. Also be mindful to use a roof anchor and some form of safety harness while undertaking roof work.
Fall protection is essential if you plan to install a roof-mount system. First thing to do in this regard is to install roof anchors and make sure to have a safety harness attached whenever you are on the roof. Roof ready boots are also very helpful in ensuring proper safety and preventing unforeseen accidents. Furthermore, a boom-lift or a scaffolding can help you a great deal in ensuring the best possible access to high places.
In the case of ground mounted solar panels, dig safety is of paramount importance. Always be careful to alert local municipal or district authorities before undertaking any sort of digging projects. This is recommended to avoid hitting any underground pipes or electrical lines. It's also best advised to avoid wet concrete while laying the panels as they can cause caustic burns. We would also ask you to wear a range of protective gear such as gloves, N-95 masks etc if you are planning to mix your own concrete. It's also good to have the eyes of a trained and experienced operator on-site especially if you are using heavy equipment.
Next we come to the question of electrical safety requirements. The first important thing to remember is to remove all metallic jewelry from your body including things such as wrist watches. Always be sure to keep a multimeter on stand by and use it before you get started to ensure zero voltage conditions before beginning to use the conductor and terminators. Make sure to keep all of your wiring striped and terminated. This should be done using a torque wrench wherever ever and wherever necessary. Lastly, we would recommend you to route your wires properly away from sharp edges and surfaces as they could cause long term damage to the wires.
We would also like to end this section with a few brief tips on lifting safety considerations. The first important thing is to ensure that the entire process is planned out thoroughly and enough planning has been undertaken to guard against unforeseen contingencies. If there are heavy winds, it's better to have two or more carrying each panel to ensure maximum safety. Always be sure to lift heavy things by squatting so that you do not put pressure on your back. Another thing to remember, is to try and minimize body’s turns while moving heavy equipment and to keep the weight close to your body so that you don't have to support it just with your arms. Lastly, we would always recommend people to use a hoist or a crane to lift heavy equipment over long heights.
Good wiring management is responsible for giving you high quality performance from your solar panels in the long run. Despite this, it is a factor that is often overlooked by many. Some of the fundamentals to keep in mind in this regard is to plan your wiring from before so that the wires do not interfere with access to the array. We also highly recommend you to use wire clips in order to secure the factory wire leads effectively in place. This is to protect them from the elements of nature such as winds for example. Also, you can use the clips to run the wires along the railing of the solar panels themselves. There are some solar panels which use spring clamps which can also be used to secure the wires. In this section we will give you a few pointers on how to plan your wiring effectively.
The path of your wiring will be different based upon the type of system that you will be installing. We will attempt to outline the specification of different systems with respect to the wiring in the section below.
In the case of a grid-tie wiring path, the PV strings will attach to a junction box. The junction box in-turn will attach to the solar inverter and the AC cable output will connect to the main/sub-panel.
For a grid-tie wiring path, the PV panel is connected to the micro-inverter. Micro-inverter is then connected to the trunk cable as the trunk cable moves into the junction box. Finally, the junction box is connected to the main panel and your wiring is complete.
The final option at your disposal is to go for an off-grid wiring option. Here, the PV strings attach to the combiner box which gets connected to the charge controllers. Charge controllers then get attached to the battery bank. The battery bank is connected to the inverter and the inverter finally connects to the load panels.
For Off-grid DC wiring setup make sure to thoroughly check all of the AC, DC and communication connections to make sure that everything is connected and torqued as per requirements. You can also mark the connection with a paint pen to know which ones have been torqued. If you bring combined DC power from a solar panel array to a power centre, make sure to terminate your solar positive wire at the Solar Input busbar and not the DC Batt busbar. Finally, ensure that you use a meter to check the terminals and busbars and see if they are operating at a safe voltage before moving on with the rest of your build.
In case you choose to go for a system that uses micro-inverters or optimizers, we would highly recommend you to make an array map that outlines the precise location of each individual device in the array. You can use the QR codes or stickers to make an array map by sticking them onto a piece of paper. Make sure to plug this array map into your monitoring software during commissioning. This will allow the monitoring software to accurately monitor production while also alerting you to malfunctioning equipment.
As we have already mentioned, it helps to plan your electrical route beforehand by taking into consideration the type of system that you are looking to install. Make sure to put on the required safety equipment and also try and install the wiring as per the specific instruction given by the wiring diagram.
If you are planning to have a system with multiple inverters, you can use an AC sub-panel to combine the AC circuits into a set of single conductors. However, be sure to make note of the fact that dedicated solar sub-panels should not contain any load breakers.
We always encourage our readers to consider running their wiring through the attic in order to hide it from view if you prefer that scenario. However, take care to ensure that it is accessible and can be connected to the array, breaker box, panel, meter, and various other parts of the system. Also make sure that you use cable clips in order to secure the wiring of solar panels and micro-inverters/power maximizers. This is important because the clips will provide much needed sturdiness to the wires during strong gusty winds. No amount of exposed wiring should be allowed to make any sort of contact with the surface of the roof.
Next, you need to run the wiring from the source of solar power to a junction box and then transition it to the conduit run. Ensure that the wiring remains in the conduit until the point that it reaches the inverter (in case of grid-tie systems) or the charge controller ( in case of battery-based systems). You can also use conduit mount flashings in order to secure the rooftop conduit firmly in its place. Furthermore, you can also make use of conduit penetration flashings which perform the task of transitioning the conduit into your attic in order to hide it from general viewing.
The first piece of advice in the case of ground mounted solar panels, is to use dedicated cable clips which can make a massive difference in helping you manage any kind of exposed wiring underneath the array. All of the wires should be well secured against strong winds and also kept away from other equipment so that it does not lead to any difficulties during maintenance. Make sure to consult the wiring diagram so that you know exactly how deep your trench should be and also consult local municipal authorities before digging. Make sure to not drive over any kind of wiring or piping systems while laying cement for your wiring foundation. You should also consult your wiring diagram in order to get a better idea about factors such as type of wiring, voltage fluctuations etc.
The specification of mounting an inverter to work with your solar panels depends on the type of solar power system you are seeking to install. In case of grid-tie systems, inverters can be wall-mounted in indoor spaces or even rigged on the back of any outdoor substructure. In case of off-grid systems, you have to wall mount your inverter.
In case of wall mounted inverters, those with integrated disconnect switches should be mounted up to a maximum height of 2 meters from the ground. If you are planning to install the inverter in your garage space, make sure to place any kind of ignition source at least 18 inches from the ground for safety. In the case of people who plan to place their inverters outdoors, the inverter should be shielded from direct sunlight and should be placed as far away from sprinklers and or any other water sources as possible.
For inverters mounted on ground mount substructures, the appliance should be mounted at a height of 36 inches from the ground at the very least. This is because the monsoon season can often produce mud on the ground which could get splashed on the appliance and cause significant issues. It should also be kept away from direct sunlight and the threadlocker on the hardware should secure the inverter bracket so that it supports the substructure adequately.
One of the most essential steps while installing a solar panel system is to ground it properly. This is vital because of a number of reasons, out of which the biggest one is protection from electric shocks. It also acts as a very valuable protective factor in the face of power surges or build of static electricity. Also in the case of a failed or broken circuit, the grounding acts as a safe pathway for fault current to disperse through.
The metal parts of your electrical system should be bonded to the ground and various conductive metal equipment must be grounded together. This is important as it ensures that all of the equipment in the system has the resistance to the ground. This is called the shared “ground reference”.
The Equipment Grounding Conductor(EGC) is the green or bare colored copper wire that connects the racking hardware, metal enclosures and the EMT conduit. The Ground Electrode Conductor (GEC) on the other hand is the wire that is used to connect the ground rod to the electrical distribution service. In the case of nearly all AC powered systems, the neutral conductor is equipped with a single bonding point where it is connected to the ground.
The neutral to ground bonds can be found in generators, breaker distribution panels, power centers, and other equipment. Make sure that the whole of your system has only one single neutral to ground bond. Something that is essential for every solar panel system is a DC negative to ground bond. Any system that features “ground fault protection” includes the DC negative to ground bond. You also have other integrated grounding solutions which you can consider.
In this section, we will try and give you a step by step breakdown of how to install a backfeed breaker. However if you are not totally comfortable with working on your breaker panel, you can easily go for professional help. A lot of newbie DIY solar panel enthusiasts do the entire setting up of solar panels themselves and outsource the wiring to professionals. However, if you feel like you can take on the challenge then read the following section carefully.
First important thing to do is to check the proper breaker size you will require. You need to source a breaker that works with your existing panel. We always recommend our readers to use new breakers which are of the same make and model as your existing breakers. Make sure to get rubber mats or a plywood stand to insulate yourself from the ground before you start working. Make sure to shut off the branch circuit breakers one at a time and then shut off the main circuit breaker. Following this you need to remove the panel cover.
Another vitally important step to remember is to test all of the wires separately with a multimeter in order to ascertain whether there is any leakage of current. Then you need to disconnect the wire of the breaker that you are looking to remove from the load terminal. After this, you need to pull out the old breaker very carefully. And while doing this you should also pay close attention to how it was fixed. You are halfway there by now and the next step is to install the new breaker and fix it into the correct position. Install the new breaker and insert it into the correct position. After this, you need to attach the stripped solar circuit wires to the terminals of the new breaker and torque them into place.
Now after this is done, there are a few more steps to follow. You need to check all of the terminals through and tighten any possible loose terminals. Also inspect the terminals closely for any other issues. Then you need to replace the panel cover and turn on the main breaker. Following this, turn on the branch breakers one by one and leave the solar for last. Make sure to test the breakers with a multimeter to see if everything works properly not. Then and only then, after carefully executing all of the steps we have mentioned, turn on the solar backfeed breaker.
After you have your wiring and electrical plans firmly in place, the next step is to mount the solar panels. And in this section, we will tell you how to mount the solar panels effectively to give yourself the best possibility of enjoying a trouble free solar energy system. We will discuss each of the specific mounting options you have at your disposal in the section below.
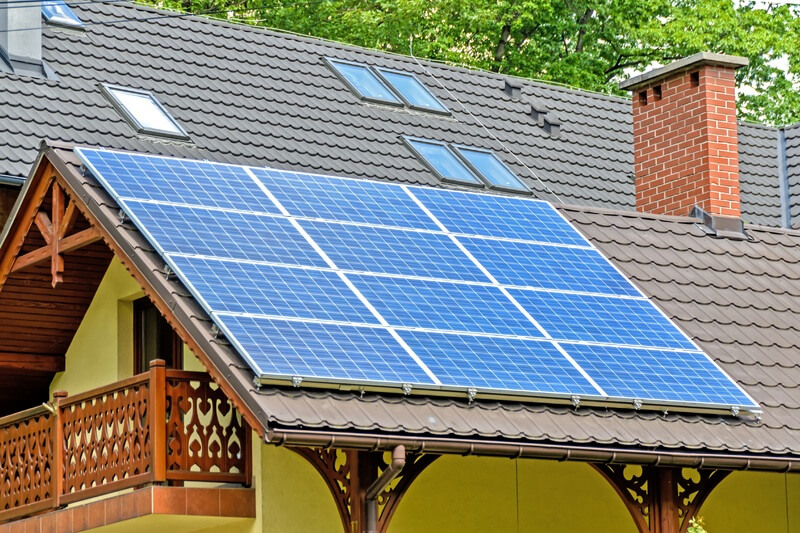
If you wish to mount your panels on the roof, you need to make sure that you follow the steps outlined below with as much precision as possible. First you need to locate and mark your roof rafters. After this, you need to install roof attachments so that you can position your rails securely in place. Then you need to install the racking rails. The penultimate step in the case of roof mounting will require you to lift up the panels up to your roof. And finally, provided that all these steps have been carried out properly, you can mount the panels on your rails. We will discuss each of these steps in a little bit more detail in the section below.
Roof-mount flashes that are bolted securely to the roof rafters are fundamental to giving you a secure foundation.. One of the easier ways to do this is to use a stud finder. The process is that you need to pass the stud finder over the surface of the rails and it will give you an indication when it has found a stud. You can find these at your local hardware store.
Another way to do this is to visually look for rafters under the eaves of your roof. In case you are not able to spot them, try and search for nails that are responsible for attaching the fascia board to the ends of the rafters.
The third way in which you can try to find the roof rafters is to use the powers of Echolocation. You can get a feel of the rafters by walking over the surface of your roof. The rafters tend to feel a bit firm whereas the space between them feels a bit more spongy. There are also rubber mallets which can be used to tap the surface of the roof and get a feel of the rafters. However if you have a roof with sheathing, this method will not be as effective.
Then there is the process of exploratory drilling which can also be used to find the rafters on your roof. You can start by drilling a small hole on the surface of your roof. If you do not find the rafter straight away, you need to bend a wire to an L-shape and insert it through the hole to search for the rafter. Once you find the rafter upon rotating the wire, you need to carefully measure a distance of 0.75 inches from the edge to the centre of the rafter. Make sure to mark this location so that you can directly drill the lag bolt through the centre of the rafter.
Once you have effectively marked the location of your roof rafters, installing the roof attachments is the next step. Note that there may be differences in this process with regards to the type of panels and the location of your setup. We have given some common pointers below, which will help you in this process.
The layout and spacing in between attachments is a good place to start.Ensure that your flashings are spaced in a way that aligns with the mounting holes of your solar panels. It's also recommended to stagger the flashing layout so that it can alternate between the top and bottom rails. Make sure to distribute the flashings evenly across all your roof rafters so that the weight of the array is spread across the whole mounting surface.
If you are planning to install the attachments on a composite / asphalt shingle roof then follow the steps mentioned here. Make sure to consult the manufacturer’s manuals in order to get the most accurate instructions for installation. You can start by breaking the seal between the shingles using a simple flat bar. Then remove any nails so that you can slide the flashing under the shingle without any issues. The next thing to do is to slide the flashing under the shingle and to tuck the flashing properly into place. Mark the drilling location through the hole in the flashing and fill the hole with roof sealant.
In case of metal rooftops, most of them use roof clamps that either attach on to a seam or a bolt into the structure in question. There can be many different clamp configurations with each one being slightly different from the other. Make sure to check the clamp manufacturer’s manual for exact details.
If you happen to have tile hooks on your roof, they can slide under the shingles and fasten to the rafters. A vertical hook will provide you with clearance from the roof tiles. Tile hook installation could require a bit of cutting and grinding of tiles. However, they are widely universal and generally work on most rooftops.
If you have bought a tile replacement system, you need to remove your older tiles and swap them out for the tile replacement flashing. A lag bolt is generally bolted to the rafters through the replacement of the tiles and this manages to function as a foundation for attaching the rails.
In the case of ballasted monuts, they do not require you to make any kind of elaborate penetrations on your roof. The weight of the entire system is supported adequately with the help of the racking base and the array.
Once you secure the flashings into place properly, you can move on to installing the racking rails. It's recommended to keep your racking report handy during this process so that you can consult it as often as required.
Conduct the entire process of measuring and cutting the rails on the ground so that you do not get scraps of metal shavings on your rooftop. Check the distance between the mounting holes at the back of the solar panel frames and ensure that the rails are spaced in a way that matches this distance. You also need to match the flashings with these spacings.
Use the given hardware to then attach the rails to the flashing. You can use a level to make sure that the rails are evenly positioned. After this, the next step is to tighten the rails with a good quality torque wrench by carefully following the manufacturer’s torque specifications. We would also advise you to attach some form of protective plastic wrapping on your rails to secure it from the threat of insects. Following this, your next step should be to attach the wire management clips and other hardware components to the micro-inverters/optimizers to the rails. Then you need to install the grounding equipment efficiently.
We have spoken about the important safety considerations that you should undertake while doing this in our Planning and Safety section so make sure to revisit that if you have any doubts.
A few other important things that we should mention here is that you should never step on the panels while moving them. Also be careful to have adequate fall protection and wrap your panels in blankets to protect them from bumping into hard surfaces as you are moving them. In terms of the methods you use for lifting, there are a few options at your disposal.
A ladder lift fitted with a conveyor belt is often used to transport heavy objects up and down the roof. You also have the option of a scissor lift which not only extends upwards but also sideways. The capacity to have horizontal movements makes a big difference as you have to take fewer trips to and for from the roof. Then we have what is called a boom lift. This type of lift comes with an entire range of movements and also gives you unmatched access to tight spaces. If you have obstacles directly underneath the place where you plan to put the panels on your orrf, this type of a lift will help you to evade obstacles and give you higher leeway for more intricate movements.
The last method that is still popular despite being somewhat traditional in the case of roof navigation is related to the process of scaffolding. If there are no obstacles in your transporting path, then a scaffolding setup works great and you might not even need any lifts of any kind. The issue with the method is that there are no additional factors which make the process easier, you get the benefits of a solid sturdy foundation.
Once you have all of your panels and the racking put in place, you are ready to install the solar panels and get your solar energy journey started. In this section we will give you a few general tips on how to mount solar panels if you have an IronRidge racking system. Make sure to consult your product manufacturer’s manual to get accurate specifications on how to mount the panels.
First, you need to place the panels in such a way that the mounting holes are more or less perfectly lined up with the rails. Then you need to use clamps to secure the panels in place. You should also ideally try and torque the clamps with stopper sleeves. Then you need to place the next panel on the rails in order to ensure that the clamps are wedged snugly in between the two consecutive panels. Following this you need to tighten the clamps between the panels.
If you are looking to ground mount your solar panels, the process is slightly different although the three main steps are more or less the same. First you need to build the foundation to support the entire structure. Then you need to install the racking rails. Finally, you need to mount the panels on your rails.
Before you start mounting the racking rails, you need to ensure that you have a good solid foundation which can support your solar panel system. Of course, the first thing we would like to remind you of is safety. Handling wet concrete can prove to be tricky for you if you are not accustomed to it, however, you can use protective equipment to ensure the best safety standards. You should definitely have an N95 mask on while working near concrete dust at the very least.
The first thing to check before diving into your foundation building is to check whether your surface is levelled or not. If it's not then you should consider levelling the grade. You can use either chalk or a string line to mark the outer dimensions of the array and the location of each individual pier on the ground. Make sure to consult your local municipal authorities to know the location of hidden power lines or pipes that are buried underground. Follow the engineering report to know the specification with regard to pier placement recommendations.
Then we would recommend you to create a temporary lumber structure that will allow you to keep the pipes in place till the time the concrete hardens and solidifies. The pipes must not move in the time it takes for the concrete to take shape as that could compromise and even sabotage the entire structure of the mount. Furthermore, all of the underground pipes should be fully suspended in concrete. This is done to ensure that the pipes do not come in contact with dirt from the ground.
This leads to a situation known as galvanic corrosion which lowers the stability and sturdiness of the overall structure and is not at all ideal for a secure solar panel setup. Also make sure that everything is set in place before you start mixing the concrete. You need to make all necessary required changes beforehand for best results. Lastly, we would urge you to wait at least for a week before you start laying the pipes and building the rest of the array. Generally, the concrete will take around 21 days to fully cure and during this period we recommend you keep the wooden brace in place.
The second step once you have set up the foundation is to install the racking rails. The racking report should be consulted during this process to get the most accurate specifications regarding rail size and spacing requirements. Make sure that you space the rails in such a way that it matches the distances between the mounting holes found on the back of the solar panels. There are certain ground mount systems which make use of a rail connector bracket that attach the rails to the horizontal support pipes with the help of U-bolts. Lastly, when you are starting a new row make sure to leave some space on both sides to account for the panel overhang.
The last step left is to actually mount the panels onto the racks. Before embarking on this process, ensure that the racking rails are installed correctly and are housed in a solid, well secured concrete foundation. The first step is to place the panels in such a way that the mounting holes line up perfectly with the rails. Then you need to use clamps to secure the panel perfectly into place. It's better to start with the outside edge of the array. Then you should torque the clamps with the stopper sleeves so that they are wedged comfortably against the outside of the first panel. Then you have to place the next panel on the rails and make sure that the clamps are well secured in between the two panels. Following this, you should tighten the clamps between the panels and repeat this entire process for every single panel in your array.
This is the last big step in the whole process if you are installing an off-grid system (or a grid-tie system with a battery backup). Generally, you will find three different types of batteries used by various solar panel energy systems. These are :
Each of these three different battery types have somewhat unique installation procedures and separate conditions they need in a battery room. We will go through each of them in detail. We would also remind you to consult your manufacturer’s plans and manuals too to get the best information regarding your own battery setup. We will start off with a few essential safety considerations which are of paramount importance.
The first and most important point that we would like to make is that you should do everything possible to ensure that your battery never gets short-circuited. This happens when the positive and negative terminals of the battery are connected to each other. This may happen due to incorrect wiring or if any sort of metal object falls onto the battery terminals. It's crucial to do everything possible in order to avoid short circuits. Always be sure to use insulated tools.
The second safety measure to keep in mind is that you should always remember to remove any type of metallic jewelry before touching the batteries as it could get caught in the wiring terminals. This includes wrist watches as well as rings on your finger. Also be sure to vigilantly remove any long hair and do not wear any sort of loose fitting clothing or material that could get caught up in the wires or terminals.
It is crucial to always wear protective gloves as well as safety goggles while working with the batteries. You should also keep a multimeter ready at hand to check the voltage and polarity of various conductors. The next thing to ensure is that all of the wires are secured, stripped or terminated effectively using a torque wrench wherever and whenever necessary. Make sure to route all the wires away from sharp edges to prevent wire damage.
If you are working with flooded lead-acid batteries then make sure to keep baking soda handy nearby. It is crucial for neutralizing acid spills that may happen due to accidents. Also be sure to wear safety goggles and have an eye-wash kit ready in case the acid somehow gets into your eyes. Be sure to wear nitrile gloves to keep your hands secure.
You should always try your best to set up your battery bank in an enclosed space to limit the possibilities of any kind of accidental contact with the batteries. Manage your space effectively and ensure that there is enough room for ventilation for the batteries to cool off. In the section below we will give you a few common tips to keep in mind while setting up your battery room in case of different types of battery setups. However you still need to check your manufacturer’s manual thoroughly to get the specific instructions.
Ideally, you should set up your battery bank in a room where you can control the temperature. Any sort of prolonged exposure to high temperatures will invariably shorten the lifespan of the battery. Your ideal ambient temperature should be somewhere around 25 degree celsius. On the other hand, temperatures that are too low will cause issues for battery capacity so there is a fine balance.
In the case of sealed lead acid batteries, you need to keep a notepad or writing board in the room to keep track of data during maintenance checks. With this type of batteries, they do not turn off the gas as a part of their routine operations, however they do come with valves which are vulnerable. They might open in case of overcharge or overheating situations. Another thing to keep in mind for this type of battery especially, is to ensure the floor is sturdy and secure to hold the weight of the batteries as they tend to weigh slightly heavier.
In the case of flooded acid lead batteries, they should always be installed over a spill containment tray in order to avoid spillage issues. Just like the previous one, you should also maintain a log book that can store recorded data. Flooded batteries should also be installed in a thoroughly vetted battery enclosure that has been built with the proper fire and electrical codes. These batteries releasehydrogen gas during the charging process so you should be very careful to not have anything in the room that may ignite the gas. Consider buying a hydrogen monitor too for best possible safety. Also ensure that the floor can hold the batteries in place securely.
For lithium ion batteries, the biggest threat is exposure to extremely low temperatures. The other issue is you cannot charge them below freezing point i.e. zero degree celsius. As a general point of note, you should always check your manufacturer’s manual in order to get the accurate temperature range for recharge and discharge.
The method you choose to install the battery bank depends upon the type of battery that you are using and its manufacturer. However, in this section we will go over some of the general points that you should keep in mind while installing the battery bank.
Sealed batteries provide higher levels of protection as the sealing prevents any kind of gaseous release. However, in situations where the battery gets overheated or overcharged. You should ensure that the battery is not placed near any kind of electrical component or loose electrical wiring. It's also recommended to avoid places which might have some discharge sparks.
The second important point to keep in mind during installation is ventilation. We have already spoken about this before and it's worth raising the point again. The best way to ensure that batteries are in the right temperature range is to ensure that they remain well ventilated with plenty of access to natural air. Check the ventilation requirements from your local authorities too as you need to be in tune with those as well. We would recommend you to leave at least 1 inch of space on either side of each battery to leave adequate room for air flow and ventilation.
The battery case which houses the battery should not come in any kind of contact with organic solvents or any kind of remotely adhesive materials. If there is a chance that the batteries might be subjected to any kind of vibration or jerking, ensure that the battery bank is fastened securely. You can also consider placing shock absorbing materials inside the enclosure space itself.
Another vital thing to keep in mind is that under no circumstances should you or anyone else, knowingly or otherwise attempt to touch the inside of the battery or dismantle the battery itself. Even though sealed lead acid batteries usually do not leak gas, they could end up spilling highly flammable gas if it gets damaged somehow. Any kind of accidental contact with the electrolyte of the battery should be cleaned thoroughly and given medical attention. In case of a small marginal acid spill, you can use baking soda as a neutralizer.
Sealed acid lead batteries are built to not release gas as a part of their regular operations. However, they do come with vents that are tasked with releasing the internal pressure in case of overcharging. This is known as off-gassing whereby the battery releases built up pressure. Make sure that your room is properly ventilated and the hydrogen level is at less than 1 percent to ensure the best safety standards. You should have good air circulation in the room as some of the larger battery variants make use of the vents to expel gases. Ideally the vent should be at the top of the enclosure because hydrogen gas is light and travels upwards naturally.
Ensure that the battery case does not come in any kind of contact with organic solvents and adhesives. Leave a min8um of 1 inch of space on either side of the battery to ensure ventilation standards. Other recommendations would be to fasten the battery securely to something if the battery is expected to face turbulence. You should also use shock absorbent material inside the enclosure. Under no conditions should anyone try to dismantle the battery or touch the insides as these could cause major consequences.
Once you have completed the setting up of batteries in the right room, the only thing left for you to do is to connect the battery wires. Here again, you should be vigilant and ensure that you follow all of your manufacturer’s instructions while undertaking these procedures. In this section we have tried to give you a few common general recommendations that you can use to smoothly connect your wires to the battery.
While connecting the wires of the battery bank, the first thing to make sure is that all of the interconnection cables are of the same or relatively same dimensions in terms of size and length. Make sure also that nothing is placed between the battery terminal and the ring terminal of the interconnect cable. The last thing to ensure is that all of the connections are torqued effectively and secured in place. In case you turn on a battery which has some loose or excessively tight connections, the battery terminals might end up melting and you may face other issues as well.
In case of connecting the wires running from the battery bank to the inverter, you need to keep the battery bank as close as possible to the inverter. Another important thing to keep in mind is that you should have positive and negative cables that are of the same length. The next recommendation is to zip tie the positive and negative cables together for an interval of every 15 inch of cable length. This should also be installed in the same conduit to get the highest possible surge capacity while managing to reduce the electromagnetic interference severely at the same time. The last thing we would like to say is that you should ensure that your cables are routed properly so that they do not interfere with the ventilation of the battery enclosure.
In this article today, we have tried to give you a comprehensive step by step review regarding how to install solar panels at home. We have gone into a lot of detail and specification to ensure that our readers can get the best idea of how to install solar panels in the true DIY style. We have tried to ensure the most exhaustive details are mentioned in order to help first timers and newbies to get a hang of the concept of installing solar panel systems. We have also tried our level best to ensure that we cover all of the topics and also the different aspects of solar panel mounting which brings different sets of requirements. For roof panel enthusiasts, we have also tried to give you the best tips on how to install solar panels on roof.
Starting a DIY solar panel journey can often seem to be a very daunting prospect. Indeed initially you might feel helpless and that there is nothing that you can understand correctly. However, with time and as you get more familiar with the components and hardware, you will learn quickly. Hopefully, this article comes of some good use to you and gets you started on your journey of installing solar panels for your home or commercial establishment. We would always urge you to be diligent and seek professional help if you are unsure about anything to avoid any serious losses to your equipment or home.
If you want practical setup and planning advice, go back to the solar resources hub and then keep reading solar net metering basics, solar panel cleaning tips, economic benefits of solar energy, solar panel subsidies in India.